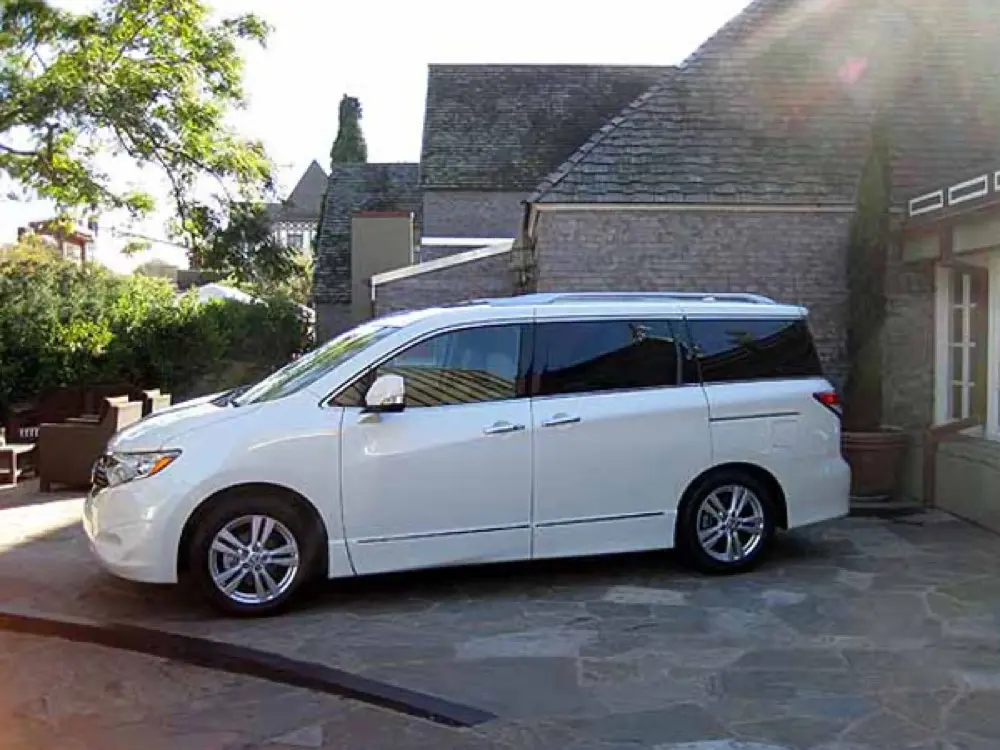
The Nissan Quest is a minivan manufactured since 1992 by Nissan, and is now in its fourth generation. First two generations were initially powered by the 3.0 L Nissan VG30E V6 engine until 1998, when the Quest received the 3.3 L version of the same engine and a few minorupdates, including a driver side sliding door, and grille and rear redesigns. The Quest was completely redesigned for 2004. The third generation model was built on the FF-L platform, which it shares with the Altima, Maxima, Teana, and Murano. It also shares the 3.5 L VQ engine with those cars. The fourth generation model is built on the same platform as the 2011 Nissan Elgrand.
Frequently Asked Questions
Can I use regular unleaded gasoline in my Nissan Quest?
Yes, most Nissan Quest models are designed to run on regular unleaded gasoline with an octane rating of 87 or higher. Using a higher octane fuel is not necessary and will not provide any significant benefits in terms of performance or fuel efficiency. However, it is important to avoid using lower octane fuels than recommended, as it can potentially cause engine knocking and other issues.
How do I change the oil in a Nissan Quest?
To change the oil in a Nissan Quest, start by lifting the vehicle using a jack and placing it on jack stands. Locate the oil drain plug underneath the engine and remove it with a wrench. Allow the old oil to drain completely, then replace the drain plug and proceed to remove the oil filter. Install a new oil filter, tighten it securely, and finally, add the recommended amount and type of oil to the engine.
How do I check the transmission fluid level in my Nissan Quest?
To check the transmission fluid level in a Nissan Quest, the engine should be warm and running, and the vehicle should be on a level surface. Locate the transmission dipstick, usually labeled with a yellow or red handle, and pull it out. Wipe the dipstick clean, reinsert it fully, and then pull it out again. Check the fluid level on the dipstick, ensuring it is within the designated range. If the level is low, add the recommended type of transmission fluid through the dipstick tube until it reaches the proper level.
How do I replace a cabin air filter in my Nissan Quest?
To replace a cabin air filter in a Nissan Quest, locate the filter housing, which is typically located behind the glove compartment or beneath the dashboard. Remove the access door or panel to gain access to the filter. Take out the old filter, noting its orientation, and replace it with a new filter of the same size and type. Reassemble the housing, ensuring it is securely fastened, and test the air flow through the vents to confirm proper installation.
How do I replace a headlight bulb in a Nissan Quest?
To replace a headlight bulb in a Nissan Quest, start by opening the hood and locating the back of the headlight assembly. Remove the electrical connector from the bulb by pressing the release tab and pulling it out. Next, twist the bulb counterclockwise to remove it from the socket. Install the new bulb by inserting it into the socket and twisting it clockwise. Finally, reconnect the electrical connector and test the headlights to ensure they are working properly.
How do I replace a serpentine belt in my Nissan Quest?
To replace a serpentine belt in a Nissan Quest, start by locating the belt tensioner, which is a pulley with a spring-loaded arm. Use a wrench or a belt tensioner tool to rotate the tensioner and relieve tension on the belt. Slide the old belt off the pulleys, making note of the belt routing. Install the new belt following the correct routing, ensuring it is properly seated on all the pulleys. Finally, release the tensioner to apply tension to the new belt and double-check its alignment.
How do I replace the brake pads on my Nissan Quest?
To replace the brake pads on a Nissan Quest, start by safely lifting the vehicle and removing the wheel. Locate the brake caliper, which is held in place by bolts or pins, and remove them to release the caliper. Carefully remove the old brake pads and replace them with new ones, making sure they are properly aligned with the caliper and rotor. Reassemble the caliper, reinstall the wheel, and repeat the process for the remaining wheels. It is always recommended to consult a repair manual or seek professional assistance for proper brake pad replacement.
How do I reset the maintenance light on my Nissan Quest?
To reset the maintenance light on a Nissan Quest, start by turning the ignition switch to the ON position without starting the engine. Within 10 seconds, press and hold the trip odometer reset button until the maintenance light starts blinking. Release the button, turn off the ignition, and then start the vehicle to verify if the maintenance light has been successfully reset. If the light remains illuminated, repeat the process or consult the vehicle’s owner’s manual for specific instructions.
How do I troubleshoot an electrical issue in my Nissan Quest?
Troubleshooting electrical issues in a Nissan Quest can be complex and may require specialized knowledge and equipment. It is recommended to start by checking the fuses related to the affected electrical component, as a blown fuse can often be the culprit. If the fuses are intact, inspect the wiring and connectors for any signs of damage or loose connections. If the issue persists, it is advisable to consult a professional automotive electrician or refer to a comprehensive repair manual for further guidance.
How often should I replace the air filter in my Nissan Quest?
It is generally recommended to replace the air filter in a Nissan Quest every 15,000 to 30,000 miles or as indicated in the vehicle’s owner’s manual. However, this interval may vary depending on driving conditions and air quality in your area. If you frequently drive in dusty or heavily polluted areas, it may be necessary to replace the air filter more frequently to ensure optimal engine performance and fuel efficiency.
What can cause a rough idle in my Nissan Quest?
A rough idle in a Nissan Quest can be caused by various factors. It could be due to a malfunctioning spark plug or spark plug wire, a clogged fuel injector, a vacuum leak, or a problem with the engine’s sensors or control modules. It is recommended to perform a thorough inspection of these components, checking for any signs of wear, damage, or contamination. Addressing and correcting the underlying issue should help improve the idle quality.
What does it mean if the check engine light is on in my Nissan Quest?
If the check engine light is on in your Nissan Quest, it indicates that there is a problem with the engine or emission control system. It could be something as simple as a loose gas cap or a more serious issue with the engine components. To determine the exact cause of the problem, it is recommended to use an OBD-II scanner to retrieve the diagnostic trouble codes (DTCs) stored in the vehicle’s computer. These codes will provide more specific information about the issue and help guide the necessary repairs.
What should I do if my Nissan Quest won’t start?
If your Nissan Quest won’t start, there are a few troubleshooting steps you can take. First, check if the battery is fully charged and the terminals are clean and secure. If the battery is fine, inspect the ignition switch and starter motor for any signs of damage or malfunction. It’s also worth checking the fuel system, such as the fuel pump and fuel injectors, as a lack of fuel can prevent the engine from starting.
What type of coolant should I use in my Nissan Quest?
For most Nissan Quest models, the recommended coolant is a long-life ethylene-glycol based coolant that meets the specifications of Nissan’s coolant specification. It is important to use the correct type of coolant to ensure proper cooling system performance and prevent any potential damage to the engine. Refer to the vehicle’s owner’s manual or consult a Nissan dealership for the specific coolant type and brand recommended for your particular model and year.
Why is my Nissan Quest’s air conditioning not blowing cold air?
If the air conditioning in your Nissan Quest is not blowing cold air, it could be due to a variety of reasons. Some common causes include a refrigerant leak, a faulty compressor, a clogged orifice tube, or an electrical issue with the AC system. It is recommended to have the AC system inspected by a qualified technician who can diagnose the exact cause of the problem and perform the necessary repairs.
